The Orange Hazelnut Cake is a culinary masterpiece that strikes a perfect balance between the earthy, toasted notes of roasted hazelnuts and the vibrant, aromatic oils of fresh citrus. If you have been searching for a dessert that feels rustic yet looks like it belongs in a high-end patisserie, this single-layer sponge is your answer. With its characteristic golden-brown exterior and a crumb so moist it practically melts on the tongue, this cake is designed for those who appreciate deep flavor profiles and sophisticated textures.
What sets this Orange Hazelnut Cake apart is the meticulous attention to sensory details. From the tiny orange zest flecks visible in every slice to the crunch of crushed roasted hazelnuts on top, every element is purposeful. This recipe isn’t just about baking; it’s about creating a visual and textural experience that begins the moment you zest your first orange and ends with the beautiful presentation on a simple white ceramic plate.

Why You Will Fall in Love with This Moist Citrus Sponge
- Unrivaled Crumb Texture: The combination of finely ground hazelnut meal and professional-grade creaming techniques results in a dense yet soft interior that stays moist for days.
- Complex Flavor Profile: We utilize both fresh zest and translucent candied orange peels to provide multiple layers of citrus intensity against the nutty base.
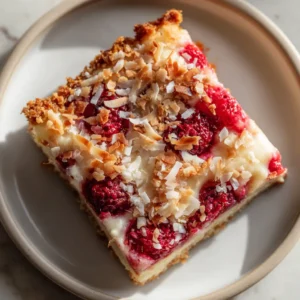
- Visually Stunning Presentation: The contrast of the golden-brown baked sponge against the bright orange curls and crushed hazelnuts makes this a showstopper for any gathering.
- Natural Side-Light Ready: Designed to look beautiful even in a simple handheld smartphone photo, this cake celebrates the beauty of unedited, rustic baking.
The Anatomy of the Perfect Orange Hazelnut Cake: Ingredients and Science
To achieve the specific visual and structural results of our Orange Hazelnut Cake, we must use high-quality ingredients that serve both flavor and function. Each component plays a vital role in the final architecture of the cake.
Roasted Hazelnuts: 1.5 cups (200g) of whole hazelnuts, toasted and ground. The roasting process releases essential oils that provide the deep brown color and intense aroma visible in the crumb.
Fresh Orange Zest: 3 tbsp (18g) of finely grated zest from organic navel oranges. These tiny orange flecks are the “flavor jewels” of the cake, providing aromatic punch without thinning the batter.
Unsalted Butter: 1 cup (225g) at room temperature. Butter provides the foundational fat necessary for a rich mouthfeel and helps create the golden-brown exterior during the Maillard reaction.
Granulated Sugar: 1.25 cups (250g). Sugar does more than sweeten; it hygroscopically holds moisture in the sponge, ensuring that “moist interior” we crave.
Large Eggs: 4 room-temperature eggs. Eggs provide the protein structure that allows the cake to rise and hold the heavy hazelnut meal in suspension.
All-Purpose Flour: 1 cup (125g) sifted. This provides the gluten network necessary to keep the cake from crumbling while still remaining tender.
Baking Powder: 1.5 tsp (7g). A critical “invisible” ingredient that ensures the single-layer cake has a soft, aerated lift rather than being a dense puck.
Sea Salt: 0.5 tsp (3g). Salt is a flavor enhancer that cuts through the richness of the nuts and the sweetness of the candied peels.
Candied Orange Peels: For the garnish, you will need 2 oranges and 1 cup (200g) of sugar. These must be boiled until translucent to achieve the high-gloss look seen in our visual blueprint.
Essential Equipment for Professional Results
Achieving a bakery-quality Orange Hazelnut Cake requires the right tools to handle the delicate oils of the nuts and the precision of the citrus prep. You will need a 9-inch (23cm) springform pan to ensure easy removal without damaging the golden-brown crust. A high-quality microplane is essential for getting those “tiny orange zest flecks” without hitting the bitter white pith. Additionally, a heavy-bottomed saucepan is required for the translucency of your candied peels, and a food processor is needed to grind your roasted hazelnuts to the perfect “meal” consistency.
Step-by-Step Guide to Baking the Orange Hazelnut Cake
1. Preparing the Nut Base and Aromatics
Start by roasting your hazelnuts at 350°F (175°C) for 10-12 minutes until the skins crack and the aroma is pervasive. Rub them in a clean kitchen towel to remove the skins, then pulse in a food processor until they resemble a coarse sand. Do not over-process, or you will end up with hazelnut butter. While the nuts cool, zest your oranges directly over your sugar; the sugar crystals will help capture the volatile oils, intensifying the citrus flavor throughout the Orange Hazelnut Cake.
2. Creaming for Structure and Aeration
In a stand mixer, cream the room-temperature butter and the orange-infused sugar for at least 5 minutes. You are looking for a pale, fluffy texture. Add the eggs one at a time, ensuring each is fully emulsified before adding the next. This step is crucial for the “visible moist interior crumb” described in our visual prompt, as it creates the air pockets that hold moisture.

3. Folding and Baking the Sponge
Gently fold in the ground hazelnuts and sifted dry ingredients. Use a wide spatula to avoid deflating the air you’ve worked so hard to incorporate. Pour the batter into your prepared pan and smooth the top. Bake for 40-45 minutes. You will know it is ready when the exterior reaches a deep golden-brown and a skewer inserted into the center comes out with just a few moist crumbs attached.
4. Crafting the Translucent Candied Peel Curls
While the cake cools, slice your orange peels into very thin strips. Simmer them in a simple syrup (equal parts water and sugar) for 20 minutes until they become translucent and glossy. These curls provide the “elevated” visual aesthetic seen on the white ceramic plate. If you enjoy the process of making refined sweets like these, you might also find success with our French almond dacquoise cookies.
Expert Tips for the Ultimate Nut Cake
- Room Temperature is Key: Ensure your eggs and butter are not cold. Cold ingredients will cause the batter to break, leading to a greasy rather than moist crumb.
- The “Fleck” Factor: Use a microplane for the zest. Larger pieces of zest can become chewy, whereas micro-flecks distribute flavor evenly.
- Don’t Skip the Toast: Raw hazelnuts lack the depth of flavor required for this Orange Hazelnut Cake. Toasting is a non-negotiable step for culinary forensics accuracy.
- Resting Period: Like a good beef tenderloin roast, this cake benefits from a short rest. Let it cool completely before adding the candied peels so they don’t slide off.
What to Serve with Your Orange Hazelnut Cake
This cake is incredibly versatile and pairs beautifully with both caffeinated and spirited beverages. For a mid-afternoon treat, a strong espresso or a floral Earl Grey tea complements the orange notes perfectly. If you are serving this as a dinner party finale, consider pairing it with a refreshing pineapple sangria to lean into the tropical-citrus profile.
For those who prefer a savory-to-sweet transition, this cake follows beautifully after a meal of poached salmon with lemon sauce, as the citrus themes create a cohesive dining experience from start to finish. If you’re looking for more handheld dessert options for your next event, our salted honey cinnamon cookies offer a similar warmth and complexity.
Storage and Preservation
The Orange Hazelnut Cake actually improves in flavor on the second day as the orange oils further penetrate the hazelnut meal. Store the cake in an airtight container at room temperature for up to 3 days. For longer storage, you can refrigerate it for up to 7 days, though we recommend bringing it back to room temperature before serving to restore the softness of the butter-based crumb. This cake also freezes exceptionally well; wrap individual slices in plastic wrap and foil for up to 3 months.
Frequently Asked Questions
Yes, but ensure you line the bottom with parchment paper and grease the sides well, as the moist hazelnut crumb can be delicate when removing it from a standard pan.
Yes, you can use store-bought hazelnut meal or flour. However, grinding freshly roasted hazelnuts provides a superior aroma and a more vibrant golden-brown color to the Orange Hazelnut Cake.
Translucency is achieved by simmering the peels in a 1:1 sugar-water syrup for at least 20 minutes. This replaces the water in the peel’s cells with sugar, creating that glossy, see-through appearance.
As written, this recipe contains all-purpose flour for structure. To make it gluten-free, replace the 1 cup of flour with a high-quality 1-to-1 gluten-free baking blend.
Dryness usually occurs from over-baking or over-mixing the batter. Ensure you fold the ingredients gently and check the cake 5 minutes before the timer ends to ensure it remains moist.
The Official Orange Hazelnut Cake Recipe

Orange Hazelnut Cake: The Ultimate Moist and Nutty Citrus Dessert
Ingredients
Equipment
Instructions
- Roast hazelnuts at 350°F (175°C) for 10 minutes. Rub off skins and pulse in a food processor until ground to a meal texture.
- Zest the oranges and massage into the sugar to release the aromatic oils.
- Cream the room-temperature butter and orange sugar until pale and fluffy (about 5 minutes).
- Incorporate eggs one at a time, beating well after each addition to ensure a stable emulsion.
- Gently fold in ground hazelnuts, sifted flour, baking powder, and salt until just combined.
- Pour batter into a 9-inch pan. Bake for 40-45 minutes until golden-brown and a tester comes out clean.
- Boil thin orange peel strips in sugar and water for 20 minutes until translucent and curled.
- Once cake is cool, place on a white ceramic plate. Garnish with candied peel curls and crushed roasted hazelnuts.
Notes
Watch the hazelnuts closely while roasting; they go from perfect to burnt very quickly.

Join the Hearth Recipe Community
The Orange Hazelnut Cake is a testament to the beauty of simple, high-quality ingredients treated with professional technique. We hope this recipe brings a touch of golden-brown warmth to your kitchen. If you enjoyed this bake, please leave a comment below and let us know how your candied peels turned out! Don’t forget to share your creations and follow us on Pinterest for more culinary inspiration and visual recipe blueprints.