There are few comfort foods as iconic as a river of rich, savory gravy cascading over a mountain of fluffy mashed potatoes. This KFC Gravy Copycat recipe nails that signature taste and texture you crave—that deep brown, glossy sheen, the smooth, thick consistency, and those tell-tale specks of coarse black pepper. Forget the drive-thru; this is how you bring the fast-food legend home.
We’ve meticulously reverse-engineered this recipe to ensure it perfectly matches the visual blueprint: a luscious, pourable gravy that’s robust enough to coat a spoon and packed with a savory, multi-layered flavor. It’s the ultimate companion for everything from fried chicken to your holiday roast, and it comes together in under 15 minutes.

Why This Gravy Recipe Is Better Than the Real Thing
This isn’t just about mimicking a famous recipe; it’s about perfecting it in your own kitchen. Here’s what makes this KFC Gravy Copycat a culinary triumph:
- Unbelievably Rich Flavor: We use a secret combination of beef and chicken broth to build a deep, savory flavor profile that pan drippings alone can’t achieve.
- Perfectly Glossy & Smooth: Our technique guarantees a thick, glossy consistency with absolutely no lumps. Just follow the steps, and you’ll get that signature sheen every single time.
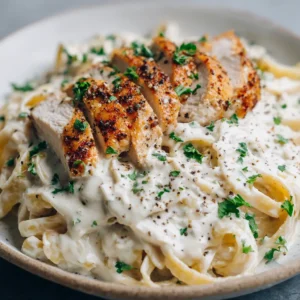
- Visually Stunning Results: From the deep, rich brown color to the visible specks of coarse black pepper, this gravy looks exactly like the real deal, making it the perfect centerpiece for your dinner table.
- Ready in Minutes: No need to wait for a roasting pan. This entire recipe is made in one small saucepan on the stovetop in less time than it takes to set the table.
The Core Components for a Flawless KFC Gravy Copycat
The magic of this recipe lies in its simplicity and the synergy between a few key ingredients. Here’s what you’ll need and why it’s essential for that iconic result.
For the Savory Roux Base
- Unsalted Butter: You’ll need 4 tablespoons (57g) of unsalted butter. This is the foundation of our roux, providing the necessary fat to create a smooth, glossy texture and rich flavor.
- All-Purpose Flour: 1/4 cup (30g) of all-purpose flour is our thickener. When toasted in the butter, it loses its raw taste and forms the paste that will give our gravy its body.
For the Signature Flavor & Color
- Beef & Chicken Broth: The real secret is a blend. You’ll use 1 cup (240ml) of beef broth and 1 cup (240ml) of chicken broth. The beef broth provides the deep brown color and robust, meaty flavor, while the chicken broth adds a classic, savory poultry note.
- Seasonings: This is where the magic happens. You’ll need 1/2 teaspoon of onion powder, 1/4 teaspoon of garlic powder, and a pinch of MSG (optional, but recommended for that authentic taste). These aromatics build the background flavor.
- Coarsely Ground Black Pepper: Use 1/2 teaspoon for those classic visible specks and a gentle, warming heat. The coarse grind is essential for the visual appeal.
- Salt: Start with 1/4 teaspoon of fine sea salt and adjust to taste. The saltiness of your broth will vary, so seasoning at the end is key.
Essential Tools for Gravy Perfection
You don’t need much to create this masterpiece, but the right tools make all the difference in achieving that smooth, velvety texture.
- Small Saucepan: A 2-quart saucepan is the perfect size for controlling the heat and ensuring your roux cooks evenly.
- Whisk: This is your most important tool. A good whisk is non-negotiable for incorporating the liquid smoothly and preventing any lumps from forming.
- Measuring Cups and Spoons: Precision is key in a recipe this simple. Accurate measurements ensure the perfect ratio of fat to flour to liquid.

Crafting a Silky, Lump-Free Gravy: A Step-by-Step Visual Guide
Follow these steps closely, paying attention to the sensory cues. The process is quick, so have all your ingredients measured and ready before you begin.
Step 1: Create the Flavorful Roux
In your small saucepan, melt the 4 tablespoons (57g) of unsalted butter over medium heat. You’ll know it’s ready when it stops foaming and the milk solids begin to turn a light golden color. Sprinkle in the 1/4 cup (30g) of all-purpose flour and immediately begin whisking. Cook the roux for 60-90 seconds, whisking constantly. The mixture will bubble and transform from a pale yellow to a light peanut butter color, and you’ll smell a nutty, toasted aroma. This step is crucial for cooking out the raw flour taste.
Step 2: Building the Gravy Base
While still whisking, slowly pour about half a cup of the combined beef and chicken broth into the roux. It will immediately seize up and form a thick, paste-like consistency. This is exactly what you want. Keep whisking vigorously for about 30 seconds to work out any potential lumps while the paste is thick.
Step 3: Achieving a Silky Smooth Consistency
Gradually stream in the remaining broth, whisking constantly. As you add more liquid, the gravy will thin out. Continue to whisk until all the liquid is incorporated and the mixture is completely smooth. Now, add your seasonings: the onion powder, garlic powder, black pepper, salt, and optional MSG. Whisk to combine everything evenly.
Step 4: The Final Simmer
Bring the gravy to a gentle simmer over medium heat. Let it bubble lightly for 2-3 minutes, stirring occasionally. You will see the gravy transform, becoming visibly thicker, glossier, and darker. It should be thick enough to coat the back of a spoon. Taste it one last time and adjust seasoning if needed. Serve immediately for that perfect, melting-butter-on-potatoes experience.
Expert Tips for Success Every Time
- Don’t Rush the Roux: Cooking the flour in the butter is essential for both flavor and texture. A raw roux tastes like paste and can have a gritty mouthfeel.
- Use Warm Broth: While not essential, using warm or room temperature broth can help prevent the roux from seizing too aggressively, making it even easier to achieve a lump-free consistency.
- Whisk, Whisk, Whisk: The single most important technique for smooth gravy is constant whisking, especially when you first add the liquid to the roux.
- If Lumps Happen: Don’t panic! If you end up with a few lumps, simply pour the finished gravy through a fine-mesh sieve before serving. No one will ever know.
Proper Storage, Reheating & Freezing Instructions
This KFC Gravy Copycat is perfect for making ahead of time. Allow the gravy to cool completely before transferring it to an airtight container. It will keep in the refrigerator for up to 4 days.
The gravy will thicken considerably once chilled. To reheat, gently warm it in a saucepan over low heat, adding a splash of broth or water and whisking until it reaches your desired consistency. Do not microwave, as it can cause the fat to separate. You can also freeze the gravy for up to 3 months. Thaw it overnight in the refrigerator before reheating as described.
Perfect Pairings: What to Serve With Your Homemade Gravy
While mashed potatoes are the classic choice, this gravy elevates so many dishes. Pour it generously over fried chicken, turkey breast, or roasted chicken. It’s an absolute must-have for a proper plate of classic chicken and dumplings.
During the holidays, this gravy is the perfect finishing touch for your Thanksgiving stuffing or drizzled over slices of roast beef. It can even transform a simple weeknight meal, like turning juicy Italian meatballs into a savory, comforting dish when served over polenta. And of course, it’s the soulmate to a hearty slow-cooker beef stew.
Frequently Asked Questions About This KFC Gravy Copycat
Absolutely! This recipe is designed to be made entirely without pan drippings. The flavor is built from a butter and flour roux, a combination of broths, and seasonings.
The key is to whisk constantly. When you add the first splash of liquid to the hot roux (flour and butter paste), whisk vigorously until it forms a thick, smooth paste before gradually adding the rest of the liquid.
Once cooled completely and stored in an airtight container, this gravy will last for 3 to 4 days in the refrigerator. It will thicken when chilled, so reheat it gently on the stove with a splash of extra broth.
Yes, this gravy freezes well. Pour it into an airtight, freezer-safe container or a freezer bag and it will keep for up to 3 months. Thaw overnight in the fridge and reheat on the stovetop, whisking until smooth.
The iconic deep brown color comes from using a combination of both beef broth and chicken broth. The beef broth provides the rich color and robust flavor, while the chicken broth adds the savory poultry notes.
Your Printable Guide to Perfect Copycat Gravy
Here it is: the complete, easy-to-follow recipe for making the best KFC Gravy Copycat right in your own kitchen. Get ready to impress everyone at the table.
KFC Gravy Copycat: The Ultimate Recipe for That Iconic Rich, Glossy Finish
Ingredients
Equipment
Instructions
- In a small saucepan over medium heat, melt the butter. Once it stops foaming, sprinkle in the flour and whisk constantly for 60-90 seconds until it turns a light peanut butter color and smells nutty.
- Slowly pour in about half a cup of the combined broths while whisking vigorously. The mixture will form a thick paste. Continue whisking for 30 seconds to eliminate lumps.
- Gradually stream in the remaining broth, whisking constantly until smooth. Add the onion powder, garlic powder, black pepper, salt, and optional MSG. Bring to a gentle simmer and cook for 2-3 minutes until thickened and glossy.
- Taste and adjust seasoning if necessary. Serve immediately over mashed potatoes, chicken, or your favorite comfort foods.
Notes
Use Warm Broth: Using warm broth can help prevent the roux from seizing, making it even easier to achieve a lump-free consistency.
If Lumps Happen: Don't panic! Simply pour the finished gravy through a fine-mesh sieve before serving.
Join the Community & Share Your Creations!
Did you make this recipe? I’d love to see it! Leave a comment below with your results, or tag your photos on Pinterest. Your feedback helps our community of enthusiastic home cooks grow!
Don’t forget to save this recipe for later—you’ll be coming back to it again and again.