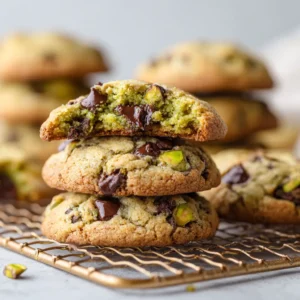
Get ready to bake the most adorable and delicious Chocolate Chip Bear Cookies you’ve ever seen! This recipe is specifically designed to create super cute, bear-shaped treats that hold their shape perfectly in the oven. Forget about sad, spread-out blobs; these cookies are crisp on the edges, soft in the middle, and packed with chocolatey goodness. They are the perfect project for a weekend baking session with kids or for making a special treat for a party.
Why You’ll Love These Adorable Chocolate Chip Bear Cookies
If you’re looking for a cookie recipe that’s as fun to make as it is to eat, you’ve found it. The dough is easy to handle, making it simple to create the bear shapes without needing special cutters. It’s a fantastic way to get creative in the kitchen. Plus, who can resist a warm, gooey chocolate chip cookie, especially when it smiles back at you? These are destined to be a family favorite, just like our classic bakery-style chocolate chip cookies.
Key Ingredients for Perfect Bear Cookies
This recipe uses simple pantry staples to create a delicious, no-spread cookie dough. Here’s what you’ll need to gather.
- All-Purpose Flour: Provides the structure for our cookies.
- Cornstarch: The secret ingredient to prevent spreading and keep the cookies soft.
- Baking Soda: Gives the cookies just the right amount of lift.
- Salt: Balances the sweetness.
- Unsalted Butter: Make sure it’s softened to room temperature for proper creaming.
- Granulated & Brown Sugar: A combination of both gives the best flavor and texture.
- Egg: Acts as a binder for the dough.
- Vanilla Extract: For that classic, warm cookie flavor.
- Mini Chocolate Chips: Mini chips work best for these smaller cookies, ensuring you get chocolate in every bite without disrupting the bear shape.
Step-by-Step Instructions for Your Chocolate Chip Bear Cookies
Follow these simple steps to create your charming bear-shaped treats. We’ll break it down into making the dough, shaping the bears, and baking them perfectly.
1. Prepare the No-Spread Cookie Dough
First, in a medium bowl, whisk together the flour, cornstarch, baking soda, and salt. Set this dry mixture aside. In a separate large bowl, use an electric mixer to beat the softened butter, granulated sugar, and brown sugar until the mixture is light and fluffy, about 2-3 minutes. Beat in the egg and vanilla extract until just combined. Gradually add the dry ingredients to the wet ingredients, mixing on low speed until a soft dough forms. Be careful not to overmix. Finally, gently stir in the mini chocolate chips.
2. Chill the Dough (The Most Important Step!)
This step is crucial for preventing the cookies from spreading. Wrap the dough tightly in plastic wrap and refrigerate for at least 2 hours, or up to 3 days. Chilling the dough solidifies the butter, which means the cookies will hold their adorable bear shape while baking.
 1")
3. Shaping Your Chocolate Chip Bear Cookies
Once the dough is chilled and firm, it’s time for the fun part! Preheat your oven to 350°F (175°C) and line two baking sheets with parchment paper. To form one bear, you will need one large ball of dough for the head (about 1.5 tablespoons) and two smaller balls for the ears (about 1/2 teaspoon each). Roll each piece into a smooth ball. Place the large ball on the prepared baking sheet and gently flatten it to about 1/2-inch thickness. Then, place the two smaller balls for the ears at the top of the head, pressing them gently so they adhere to the main cookie. For a sweet and savory twist, you might also love our salted caramel pretzel cheesecake balls.
4. Baking to Golden Perfection
Arrange the shaped cookies about 2 inches apart on the baking sheets. Bake for 10-12 minutes, or until the edges are lightly golden brown. The centers should still look slightly soft. Let the cookies cool on the baking sheet for 5 minutes before transferring them to a wire rack to cool completely. This helps them set up properly.
Pro Tips for the Cutest Cookies
- Work with Cold Dough: If your kitchen is warm, work with only half the dough at a time, keeping the rest in the refrigerator.
- Uniform Sizes: Use a cookie scoop to ensure your “head” and “ear” pieces are consistent sizes for evenly baked cookies.
- Don’t Overbake: Pull the cookies from the oven when the centers still look a little underdone. They will finish baking on the hot pan.
 2")
Decorating Your Bear Cookies
Wait until the cookies are completely cool before decorating. You can use a food-safe marker or a little bit of melted chocolate to draw on eyes and a nose. A toothpick dipped in melted chocolate works perfectly for this delicate task. Get creative and give each bear its own unique expression!
Storing Your Chocolate Chip Bear Cookies
Store your finished cookies in an airtight container at room temperature for up to 5 days. You can also freeze the unbaked, shaped cookie dough for up to 3 months. Simply place the shaped dough on a baking sheet, freeze until solid, and then transfer to a freezer-safe bag. You can bake them straight from the freezer, just add an extra 1-2 minutes to the baking time.
Frequently Asked Questions
Yes, the dough can be made and refrigerated for up to 3 days before baking. You can also freeze the shaped, unbaked cookie dough for up to 3 months for a quick treat later.
Yes, absolutely! This recipe is designed to be made without any special cutters. You simply roll one larger ball of dough for the head and two smaller balls for the ears, then press them together on the baking sheet.
The most crucial step is to chill the dough for at least 2 hours. Chilling solidifies the butter, which prevents the cookies from spreading and losing their shape during baking. Using cornstarch in the dough also helps create a softer cookie that holds its form.
For best results, wait until the cookies are completely cool. A toothpick dipped in a small amount of melted chocolate is perfect for drawing on eyes and a nose. You can also use a food-safe marker.
Mini chocolate chips work best. Their small size ensures you get chocolate in every bite without interfering with the shaping process or making the cookies look lumpy.
More Dessert Recipes You’ll Adore
If you had fun making these cute cookies, explore some of our other delightful dessert recipes. For a no-bake option that’s just as fun, try our no-bake chocolate eclair cake, or dive into the rich flavors of a chocolate raspberry tart.
We Want to See Your Creations!
We absolutely love seeing your take on our recipes! If you make these Chocolate Chip Bear Cookies, please leave a comment below and let us know how they turned out. Don’t forget to share a photo of your adorable creations on Pinterest!
 3")
Chocolate Chip Bear Cookies Recipe
Chocolate Chip Bear Cookies (That Hold Their Shape!)
Ingredients
Equipment
Instructions
- In a medium bowl, whisk together the flour, cornstarch, baking soda, and salt. Set aside.
- In a large bowl, beat the softened butter, granulated sugar, and brown sugar with an electric mixer until light and fluffy (about 2-3 minutes).
- Beat in the egg and vanilla extract until just combined.
- Gradually add the dry ingredients to the wet ingredients, mixing on low speed until a soft dough forms. Gently stir in the mini chocolate chips.
- Wrap the dough in plastic wrap and refrigerate for at least 2 hours.
- Preheat your oven to 350°F (175°C). Line two baking sheets with parchment paper.
- To form a bear, roll one 1.5-tablespoon ball of dough (head) and two 1/2-teaspoon balls (ears).
- Place the head on the baking sheet, gently flatten, and press the two smaller ear balls onto the top.
- Bake for 10-12 minutes, until edges are lightly golden. Let cool on the baking sheet for 5 minutes before moving to a wire rack to cool completely.
Notes
Use a cookie scoop for uniform cookie sizes.
Let cookies cool completely before decorating with melted chocolate for the face.