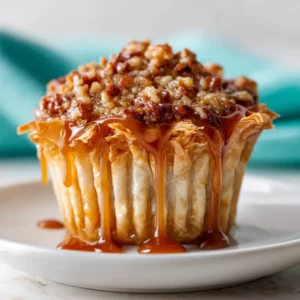
Welcome to the last chocolate mousse filling recipe you’ll ever need. If you’ve ever dreamt of a filling that is intensely chocolatey, impossibly airy, yet perfectly stable for stacking between cake layers, you’ve found it. This recipe is specifically engineered to hold its shape, providing that luscious, cloud-like texture without compromising structure. It’s the secret weapon your desserts have been waiting for.
Forget fillings that weep or collapse. We’re diving deep into the technique that makes this mousse a reliable and decadent choice for everything from layer cakes to cupcakes and tarts. Get ready to elevate your baking with this foolproof guide.
Why This is the Best Chocolate Mousse Filling Recipe
This isn’t just another chocolate mousse recipe; it’s a game-changer for bakers. The key is its stability. Unlike traditional mousses that are best eaten with a spoon, this version is robust enough to act as a filling, providing rich flavor and a dreamy texture that stays put. It’s the perfect balance of light and substantial.
The Secret to a Perfectly Stable Mousse Filling
The magic lies in a simple, but crucial, element: gelatin. A small amount of bloomed gelatin gives the whipped cream and chocolate base the structure it needs to stand up to the weight of cake layers. This ensures your beautiful creations look just as good as they taste, without any disappointing sogginess or squishing. We combine this with high-quality chocolate and a precise whipping technique to create a mousse that is both sturdy and silky-smooth.

Ingredients You’ll Need
Crafting this perfect filling requires a few high-quality ingredients. Here’s what you’ll need to gather:
- High-Quality Dark Chocolate: The star of the show. Use a chocolate with at least 60-70% cacao for a deep, rich flavor that isn’t overly sweet. Chopped bars or callets work best for even melting.
- Heavy Whipping Cream: This is the foundation of the mousse’s light texture. Make sure it’s well-chilled to achieve the best volume when whipping.
- Unflavored Gelatin: Our stabilizing agent. It’s a non-negotiable for a filling that needs to hold its shape.
- Cold Water: To bloom the gelatin, activating its setting power.
- Granulated Sugar: Just enough to balance the bitterness of the dark chocolate without making the filling cloying.
- Egg Yolks: These add richness and a custard-like creaminess to the base.
- Vanilla Extract: A splash of pure vanilla extract enhances the chocolate flavor beautifully.
Step-by-Step Instructions
Follow these steps carefully for a flawless chocolate mousse filling every time.
- Bloom the Gelatin: In a small bowl, sprinkle the gelatin over the cold water. Let it sit for 5-10 minutes to soften and “bloom.”
- Melt the Chocolate: Place the chopped dark chocolate in a large, heatproof bowl. Melt it gently over a double boiler or in the microwave in 30-second intervals, stirring until smooth. Set aside to cool slightly.
- Create the Custard Base: In a separate heatproof bowl, whisk together the egg yolks and granulated sugar until pale and slightly thickened. Set this bowl over a saucepan of simmering water (a double boiler) and cook, whisking constantly, until the mixture is thick enough to coat the back of a spoon.
- Incorporate the Gelatin: Remove the custard base from the heat. Microwave the bloomed gelatin for 5-10 seconds until it’s liquid, then immediately whisk it into the hot egg yolk mixture until fully combined.
- Combine with Chocolate: Pour the hot custard and gelatin mixture over the melted chocolate. Let it sit for a minute, then stir gently from the center outwards until you have a smooth, glossy ganache. Stir in the vanilla extract. Let this mixture cool to room temperature.
- Whip the Cream: In a large, chilled bowl, whip the cold heavy cream until it holds medium-stiff peaks. Be careful not to overwhip, as this can make the mousse grainy.
- Fold to Perfection: Gently fold about one-third of the whipped cream into the chocolate mixture to lighten it. Then, carefully fold in the remaining whipped cream in two additions until just combined and no streaks remain. The key is to be gentle to maintain the airy texture.
- Chill to Set: Cover the mousse and refrigerate for at least 4-6 hours, or until firm enough to use as a filling. The mousse will set up to be pipeable and spreadable.
How to Use Your Chocolate Mousse Filling
This versatile mousse is perfect for a wide range of desserts. Its stable nature opens up a world of possibilities beyond a simple dessert cup.
As a Cake Filling
This is where our recipe truly shines. To use as a cake filling, pipe a dam of buttercream around the edge of each cake layer first. This prevents the mousse from squishing out. Then, spread the chilled chocolate mousse filling evenly inside the dam. Its firm yet airy texture is a perfect complement to a classic flourless chocolate torte or your favorite layer cake.
For Cupcakes
Core the center of your cupcakes and fill them with the mousse for a decadent surprise. It pairs wonderfully with vanilla, chocolate, or even raspberry cupcakes. Top with your favorite frosting, like a light strawberry marshmallow frosting, for a stunning dessert.
In Tarts and Pies
Spoon the mousse into a pre-baked sweet pastry crust or graham cracker crust for an elegant no-bake tart. Let it set in the refrigerator and top with chocolate shavings or fresh berries before serving.
As a Standalone Dessert
Of course, you can always enjoy this mousse on its own! Simply pipe or spoon it into glasses or bowls and chill. It’s a simple yet sophisticated dessert that never fails to impress. For a fun twist, layer it with crushed cookies and cream in a trifle, similar to this beautiful berry trifle.
Tips for Success: Achieving a Flawless Mousse
- Use High-Quality Chocolate: The flavor of your mousse is entirely dependent on the quality of your chocolate. Choose a brand you love to eat on its own.
- Don’t Overwhip the Cream: Whip your cream to medium-stiff peaks. If you overwhip, the fat solids will separate, resulting in a grainy or buttery mousse.
- Temperature is Key: Ensure your chocolate mixture has cooled to room temperature before folding in the whipped cream. If it’s too hot, it will melt the cream and deflate the mousse.
- Fold Gently: Use a large spatula and a gentle hand when folding the whipped cream into the chocolate base. The goal is to incorporate it without knocking out all the air you whipped in.

Delicious Variations to Try
While this classic chocolate mousse filling is divine on its own, it’s also a wonderful canvas for other flavors.
Spiked Chocolate Mousse Filling
Add 1-2 tablespoons of your favorite liqueur to the chocolate mixture along with the vanilla. Grand Marnier, Irish cream, or a coffee liqueur would be excellent choices.
Mint Chocolate Variation
For a refreshing twist, add 1/2 teaspoon of peppermint extract to the chocolate base. This creates a flavor profile reminiscent of our popular mint chocolate chip protein balls.
Orange Zest Infusion
Add the finely grated zest of one orange to the chocolate mixture. Chocolate and orange are a classic pairing that adds a bright, citrusy note to the rich mousse.
Storing and Make-Ahead Instructions
This chocolate mousse filling is perfect for making ahead. It can be prepared up to 2 days in advance and stored in an airtight container in the refrigerator. If using it for a cake, you can fill the cake a day before you plan to serve it. This allows the filling to set completely and the flavors to meld beautifully with the cake layers. Just be sure to keep the assembled cake refrigerated.
Troubleshooting Common Mousse Problems
Even the best bakers run into issues sometimes. Here’s how to fix common problems:
- Grainy Mousse: This usually happens for two reasons: the cream was overwhipped, or the chocolate seized. To prevent this, watch your cream carefully and melt your chocolate gently.
- Runny Mousse: Your mousse may not have chilled long enough, or the cream was under-whipped. Ensure you whip the cream to medium-stiff peaks and allow for the full 4-6 hours of chilling time for the gelatin to work its magic.
- Stiff Mousse: If your mousse is too firm, it may have been over-mixed, or the gelatin ratio was off. Be gentle during the folding stage to keep it light and airy.
Frequently Asked Questions about Chocolate Mousse Filling
Traditional chocolate mousse is often too soft and can collapse under the weight of cake layers. This recipe is specifically designed with a stabilizer (gelatin) to make it firm enough to be a reliable and delicious cake filling.
The most effective way to stabilize mousse for filling is by adding a binding agent like gelatin. Blooming a small amount of gelatin in water and incorporating it into your mousse base provides the structure needed to hold its shape.
This chocolate mousse filling can be made up to 2 days in advance and stored in an airtight container in the refrigerator. An assembled cake with this filling should also be kept refrigerated and is best enjoyed within 3 days.
For a rich, deep flavor, we highly recommend using a high-quality dark chocolate with a cacao percentage between 60% and 70%. Using chopped chocolate bars or callets (wafers) ensures it melts smoothly and evenly.
No, it will not. Because this mousse is stabilized, it holds its form and moisture without weeping into the cake layers. For extra security, you can pipe a dam of buttercream around the edge of your cake layer before adding the filling.
Share Your Creations!
Now that you have the ultimate recipe for a stable and delicious chocolate mousse filling, it’s time to get baking! We know this will become a staple in your dessert repertoire. We can’t wait to see the beautiful cakes, cupcakes, and tarts you create. Share your masterpieces with us in the comments below or tag us on Pinterest!

Chocolate Mousse Filling Recipe
Chocolate Mousse Filling: The Ultimate Stable & Silky Recipe
Ingredients
Equipment
Instructions
- In a small bowl, sprinkle the gelatin over the cold water. Let it sit for 5-10 minutes to soften.
- In a large heatproof bowl, melt the chopped dark chocolate over a double boiler or in the microwave until smooth. Set aside.
- In a separate heatproof bowl, whisk egg yolks and sugar until pale. Cook over a double boiler, whisking constantly, until the mixture thickens.
- Remove custard from heat. Microwave bloomed gelatin for 5-10 seconds until liquid, then whisk into the hot egg yolk mixture.
- Pour the hot custard mixture over the melted chocolate. Stir until a smooth ganache forms. Add vanilla extract. Let cool to room temperature.
- In a chilled bowl, whip the cold heavy cream to medium-stiff peaks.
- Gently fold one-third of the whipped cream into the chocolate mixture to lighten it. Then, fold in the remaining cream in two additions until just combined.
- Cover and refrigerate for at least 4-6 hours, or until firm enough to use as a filling.
Notes
Ensure the chocolate mixture is completely at room temperature before folding in the whipped cream to prevent it from melting.
Be gentle when folding to maintain the airy texture of the mousse.